DelphiVersions
I’ve many projects that require different versions of Delphi. I’ve viewed many include files, not completely satisfy with any solution that was clean.
DelphiVersions is an include file of Delphi version compiler directives, supporting Delphi 2007 – Delphi 10.2.
Simple 301 Redirect for ASP.NET
A 301 Redirect is a way of sending search engines and user traffic to a specific? URL ,? also telling the search engines to do a permanently move on? that URL.
Implementing 301 redirect in ASP.NET Webforms or ASP.NET MVC; Simply use the Application_BeginRequest event in Global.asax. Then retrieve the URL from the Web.Config file or a Repository.
protected void Application_BeginRequest(Object sender, EventArgs e)
{
string path = "";
switch (Request.Url.Scheme)
{

case "https":
Response.AddHeader("Strict-Transport-Security", "max-age=300");
break;
case "http":
    if (Request.Url.PathAndQuery == "/")
     {

    path = "https://" + WebUtils.WebConfigUtils.GetAppSettingskey("SiteURL") + "/";

    }
else
    {
     path = "https://" + WebUtils.WebConfigUtils.GetAppSettingskey("SiteURL") + "/" + Request.Url.PathAndQuery;

    }
    Response.Status = "301 Moved Permanently";
    Response.AddHeader("Location", path);
    break;
   }
}
- When a URL request for an http is made, the switch statement responses by inserting a 301 Moved Permanently and the new location path into the HTTP header .
- Store the SiteURL in the Web.Config or a Repository.
- When a URL request for an https is made,the switch statement responses by in inserting Strict-Transport-Security telling the browser to prevent any communications from being sent for HTTP.
Test this function locally in your development environment use IIS Express SSL option.?
References
301 Moved Permanently
http://moz.com/learn/seo/redirection
HTTP Strict Transport Security
https://www.owasp.org/index.php/HTTP_Strict_Transport_Security
Global.asax
http://msdn.microsoft.com/en-us/library/1xaas8a2%28v=vs.71%29.aspx
NovusCodeLibrary.NET – Utilities Library for .NET
https://github.com/novuslogic/NovuscodeLibrary.NET
Working with SSL at Development Time is easier with IISExpress
Working with SSL at Development Time is easier with IISExpress
Encoding a ASP.NET MVC 4 Model for Javascript within a Razor Page
Sometimes you want to pass a property of a model to a Javascript variable, by encoding an ASP.NET 4 model into a Javascript variable, ?using ?HTML Helper and a strongly-typed model within a Razor Page. Razor Page
Razor Page
@model MyWebApp.Models.Foo
@{
ViewBag.Title = "Foo";
}

<script type="text/javascript">
var _model = @Html.Raw(Json.Encode(Model))
</script>
@Scripts.Render("/scripts/Foo.js")
- The model must be strongly-typed.
- Model encoding must be done at the top of the Razor page to allow the encoded JSON variable to be accessible.
- JQuery must be included.
Example output
<script type="text/javascript">
var _model = {"Firstname":"Adam","Lastname":"Johnston"}
</script>

_model.Firstname
_model.Lastname
Using LESS.JS and ASP.NET MVC 4
Using LESS.JS with ASP.NET MVC 4 is a great for extending the behaviour of CSS with variables, operations and functions.
There are two ways to use LESS with CSS and ASP.NET MVC 4 either dotlesscss or LESSCSS.JS for this post I will be focusing on LESSCSS.JS because dotlesscss doesn’t support all features of LESS.JS.
IIS
A ?.less? MIME Type must be registered with IIS at the command line with in the IIS directory e.g C:\Program Files (x86)\IIS Express:
appcmd set config /section:staticContent /+[fileExtension='.less',mimeType='text/css']
web.config
Next add the mine type to the web.config of the ASP.NET MVC 4 project:
<system.webServer>
    <staticContent>
       <mimeMap fileExtension=".less" mimeType="text/css" />
   </staticContent >
</system.webServer>
Razor Page
Add ?.less? files before the less.min.js to avoid namespace issues and always add the ?less.js? last of your ?.less? files.
<head>
    <link rel="stylesheet/less" type="text/css" href="@Href("~/Content/theme.less")" />
    <script src="@Href("/scripts/less.min.js")"></script>
</head>
Links
LESS CSS JS
http://lesscss.org/
dotlesscss
http://www.dotlesscss.org/
Add a MIME Type
http://technet.microsoft.com/en-au/library/cc725608%28v=ws.10%29.aspx
Delphi and .NET Interop with JVCL
There are different methods for Delphi to communicate with the .NET Framework:
- Commercial projects e.g. Remobjects Hydra, Atozed CrossTalk and Managed VCL etc.
- Importing .NET Assembly using the Import Component Wizard.
- Or Open Source method using JVCL.
Why choose JVCL over the commercial projects and the Import Component Wizard which is part of Delphi?
- Open Source e.g. free as in beer.
- Independent of regasm.exe which registers Class Libraries into the Global Assemble Cache (GAC)
How does JclDotNet work?
JVCL provides communication to the .NET Framework using the JclDotNet unit, by providing variant based
late bound automation to the .NET class library.
This post will provide two examples by stepping through each part, which should provide a basic grounding on how the JVCL JclDotNet unit communicates with .NET Framework.For these examples your Delphi must have JVCL 3.45 or higher installed and forthe C# Class Library .NET 4.5 Framework (Visual Studio 2012).
Example 1
This example demonstrates a basic adding of two numbers together, by calling the C# class library Example1ClassLibrary.DLL
Delphi Example
- To start the TJclClrHost class must initialize a .NET Framework – Common Language Runtime (CLR) and start the host:
Host := TJclClrHost.Create('v4.0.30319');
Host.Start();
- NOTE: By default if you leave the ClrVer variable blank, it defaults to v2.0.50727.
Host := TJclClrHost.Create;
- For this example we will be using CLR v4.0.30319 which supports either .NET 4.5 or .NET 4 Framework.
- C# Class Library must now be initialize and Obj: OleVariant for the access to method:
Obj := Host.DefaultAppDomain
.CreateInstance('Example1ClassLibrary' {.NET Assemble Name},

'Example1ClassLibrary.Example1' {Namespace.Classname})

.UnWrap();
- First part is the name of .NET Assemble File ‘Example1ClassLibrary.dll’.
- ‘Example1ClassLibrary.Example1‘ next part is the namespace and the classname
- Accessing this method from the C# Class Library as simple has keeping the name and the parameters the same as the class library:
Result := Obj.AddFunction(aXValue, aYValue);
- Release the CLR host just stop and free the TJclClrHost class:
Host.Stop();
Host.Free;
Full Function
function TfrmMain.AddFunction(aXValue: Integer; aYValue:Integer): Integer;
var
  Host: TJclClrHost;
  Obj: OleVariant;
begin
  try
    Host := TJclClrHost.Create('v4.0.30319');
    Host.Start();

    Obj := Host.DefaultAppDomain
        .CreateInstance('Example1ClassLibrary',
        'Example1ClassLibrary.Example1')
        .UnWrap();

     Result := Obj.AddFunction(aXValue, aYValue);

    Host.Stop();
    Host.Free;
  Except
     on E : Exception do
     begin
       ShowMessage('Exception class name = '+E.ClassName + ' ' + 'Exception message = '+E.Message);
     end;
  end;
end;
C# Class Library
Some basic setting up of example 1 Class Library allowing Delphi work with Interop Services:
- Include in your namespace for the Interop Services
using System.Runtime.InteropServices;
- To expose the class to COM access to Delphi
[ComVisible(true)]
public class Example1
- All functions must be public
public int AddFunction(int aXValue, int aYValue)
{
return aXValue + aYValue;
}
Class Library
namespace Example1ClassLibrary
{
    [ComVisible(true)]
    public class Example1
    {
        public int AddFunction(int aXValue, int aYValue)
        {
            return aXValue + aYValue;
        }
    }
}
Example 2
In this example we take the basic adding of two numbers together and expand out how Delphi can access the Example2ClassLibrary.DLL using the mscorlib_TLB import library:
Delphi Example
uses
mscorlib_TLB, Windows, Messages, SysUtils, Variants, Classes, Graphics, Controls, Forms,
Dialogs,? StdCtrls, JclDotNet;
- NOTE: mscorlib_TLB should be the first unit.
- Initializing the host to .NET Framework in the formcreate event:
procedure TfrmMain.FormCreate(Sender: TObject);
begin
   FClrHost := TJclClrHost.Create('v4.0.30319');

   FClrHost.Start;
end;
- Setup the access to the Class Library path and application:
Fads.ApplicationBase := '..\Example2\Debug\Win32\';
Fad := FClrHost.CreateAppDomain('myNET', Fads);
- NOTE: CreateAppDomain(‘myNET’ should be a different name if two or more a being called.
- The C# Class Library must now be initialize and Obj: OleVariant for the access to the method:
obj := (Fad as _AppDomain).CreateInstanceFrom('Example2ClassLibrary.dll',
     'Example2ClassLibrary.Example2');
ov := obj.Unwrap;result := ov.AddFunction(aXValue, aYValue);
- To release the CLR host just stop and free has been setup on the FormDestory event:
procedure TfrmMain.FormDestroy(Sender: TObject);
begin
  FClrHost.Stop();
  FClrHost.Free;
end;
Full Function
function TfrmMain.AddFunction(aXValue: Integer; aYValue:Integer): Integer;
var
  Fads: TJclClrAppDomainSetup;
  Fad: TJclClrAppDomain;
  Ov: OleVariant;
  obj: _ObjectHandle;
begin
  try
    Fads := FClrhost.CreateDomainSetup;

    Fads.ApplicationBase := '..\Example2\Debug\Win32\';
    Fad := FClrHost.CreateAppDomain('myNET', Fads);
    obj := (Fad as _AppDomain).CreateInstanceFrom('Example2ClassLibrary.dll',
         'Example2ClassLibrary.Example2');
    ov := obj.Unwrap;
    result := ov.AddFunction(aXValue, aYValue);
  except
    on E : Exception do
     begin
       ShowMessage('Exception class name = '+E.ClassName +
          ' ' + 'Exception message = '+E.Message);     end;
  end;
end;
Download Examples
https://github.com/acj1971/DelphiDotNETInteropJVCLExamples
Links
JVCL
http://jvcl.delphi-jedi.org/
.NET 4.5 Framework
http://www.microsoft.com/en-au/download/details.aspx?id=30653
Common Language Runtime (CLR)
http://msdn.microsoft.com/en-us/library/8bs2ecf4.aspx
Remobjects Hydra
http://www.remobjects.com/hydra/
Atozed CrossTalk
http://www.atozed.com/CrossTalk/index.en.aspx
Managed VCL
http://www.managed-vcl.com/
Import Component Wizard
http://docwiki.embarcadero.com/RADStudio/XE3/en/Import_Component_Wizard
Encrypting ASP.NET appSettings Web.Config File
It is recommended to encrypt the AppSettings key in the ASP.NET Web.Config file for security reason. The simplest method is using aspnet_regiis.exe command-line utility; this command-line utility is available from .NET 2 Framework or higher, for this blog I will be using .NET Framework 4.0.
aspnet_regiis.exe
The location of aspnet_regiis.exe command-line utility is:
C:\Windows\Microsoft.NET\Framework\v4.0.30319\aspnet_regiis.exe
Encryption
To encrypt the appSettings key at the command-line:
C:\Windows\Microsoft.NET\Framework\v4.0.30319\aspnet_regiis.exe ?pef appSettings “c:\project\directory” -prov “DataProtectionConfigurationProvider”
- Specify the full path to aspnet_regiis.exe command-line utility
- Use -pef appSettings to set the appSettings key
- Use -prov “DataProtectionConfigurationProvider”
.NET Framework 4.0 has two built-in providers for encrypting the appSettings key in ASP.NET Web.Config file:
- DataProtectionConfigurationProvider Windows data protection API (DPAPI)
- RSAProtectedConfigurationProvider RSA encryption
The simplest provider to use is the DataProtectionConfigurationProvider, there are no RSA keys to be created and setup, with the DataProtectionConfigurationProvider it’s server -specific.
When copying the Web.Config file from your development environment, encrypt the appSettings key on the server using DataProtectionConfigurationProvider provider otherwise the appSettings key will not be decrypted correctly.
The RSAProtectedConfigurationProvider RSA encryption, the RSA keys can be copied from development environment to server without change.
Decryption
To decrypt the appSettings key at the command-line:
C:\Windows\Microsoft.NET\Framework\v4.0.30319\aspnet_regiis.exe -pdf appSettings “c:\project\directory ”
- Specify the full path to aspnet_regiis.exe command-line utility
- Use ?pdf appSettings to set the appSettings key
C# Example reading appSettings Key
With this example the appSettings key is read and decrypted automatically:
using System.Configuration;
using System.Web.Configuration;

private void EncryptAppSettings()        {
           Configuration objConfig = WebConfigurationManager.OpenWebConfiguration(
                  Request.ApplicationPath);
           AppSettingsSection objAppsettings =
            (AppSettingsSection)objConfig.GetSection("appSettings");
          if (!objAppsettings.SectionInformation.IsProtected)
            {
            objAppsettings.SectionInformation.ProtectSection
                            ("DataProtectionConfigurationProvider");
                  objAppsettings.SectionInformation.ForceSave = true;
                 objConfig.Save(ConfigurationSaveMode.Modified);
            }
        }
Links
ASP.NET IIS Registration Tool (Aspnet_regiis.exe)
http://msdn.microsoft.com/en-us/library/k6h9cz8h%28v=vs.100%29.aspx
How To: Encrypt Configuration Sections in ASP.NET 2.0 Using DPAPI
http://msdn.microsoft.com/en-us/library/ff647398.aspx
How To: Encrypt Configuration Sections in ASP.NET 2.0 Using RSA
http://msdn.microsoft.com/en-us/library/ms998283.aspx
DpapiProtectedConfigurationProvider Class
http://msdn.microsoft.com/en-us/library/system.configuration.dpapiprotectedconfigurationprovider%28v=vs.100%29.aspx
RsaProtectedConfigurationProvider Class
http://msdn.microsoft.com/en-us/library/system.configuration.rsaprotectedconfigurationprovider%28v=vs.100%29.aspx
Using WordPress on AWS EC2 Free Tier
Here is a guide on how to setup WordPress on Amazon EC2 Free Tier
Setup
-
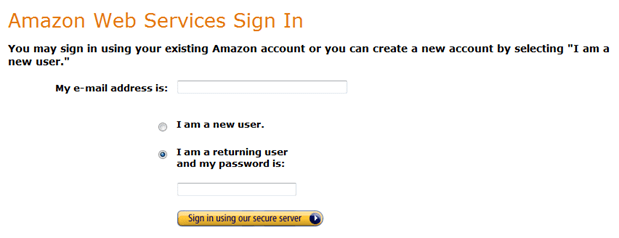
Sign up for a AWS Account at http://aws.amazon.com/

-
Sign up for a Amazon EC2 at http://aws.amazon.com/ec2

- Sign into the AWS Console
-
Choose a Region before launching your new EC2 instance.

- Create EC2 Linux Micro Instance for WordPress:
- To start a new EC2 instance click on the Launch Instance button.

-
In the “Request Instances Wizard” tab to the Community AMI’s then filter using “wordpress” then choose the AMI:
bitnami-wordpress-3.1-0-linux-ubuntu-10.04-ebs (ami-30f18f62)

- For your Free instance, choose the number of instances: 1, Availability Zone: No Preference and Instance Type: Micro (t1 micro, 613MB).

- Shutdown Behavior option should be stop, and all other options Use Default.

-
Add in a tag key = Name and value = Webserver.

-
Create a new Key Par call it the name of the website then create and save this file somewhere on your local machine that can be grabbed latter. E.g xyz.pem

-
Adjust Security Groups,
Add rules for SSH, HTTP, HTTPS but leave the source as 0.0.0.0/0

- Now Lunch the instance

- Assign Elastic IP then Associate Address with your EC2 Instance
- Click on Instances within the EC2 console to find the Public DNS.

- Install Open SSH on Windows
-
Set pem file to Read by owner
chmod 400 xyz.pem
-
SSH in to the instance
ssh -i xyz.pem bitnami@ec2-<public DNS>.ap-southeast-1.compute.amazonaws.com
-
Move WordPress to run at the root of the apache web server by editing httpd.conf file using vi
sudo vi /opt/bitnami/apache2/conf/httpd.conf
DocumentRoot “/opt/bitnami/apache2/htdocs”
To
DocumentRoot “/opt/bitnami/apps/wordpress/htdocs”
<Directory />
Options Indexes MultiViews +FollowSymLinks
AllowOverride All
Order allow,deny
Allow from all
</Directory>
<Directory “/opt/bitnami/apache2/htdocs”>
To
<Directory “/opt/bitnami/apps/wordpress/htdocs”>
Comment out:
#Include “/opt/bitnami/apps/wordpress/conf/wordpress.conf”
-
Create an .htaccess file for WordPress
This also enables you to have pretty permalinks like myblog.com/tour
Add .htaccess file to WordPress dir
in /opt/bitnami/apps/wordpress/htdocs/.htaccess
# BEGIN WordPress
<IfModule mod_rewrite.c>
RewriteEngine On
RewriteBase /
RewriteCond %{REQUEST_URI} !=/server-status
RewriteCond %{REQUEST_FILENAME} !-f
RewriteCond %{REQUEST_FILENAME} !-d
RewriteRule . /index.php [L]
</IfModule>
# END WordPress
-
Configure WordPress to know its own DNS entry
sudo vi /opt/bitnami/apps/wordpress/htdocs/wp-config.php
define(‘WP_HOME’, ‘http://www.ringio.com’);
define(‘WP_SITEURL’, ‘http://www.ringio.com’);
-
Install Filezila
Public DNS
SSH Username: bitnami
Password: <Blank>
-
delete the /opt/bitnami/updateip file. Otherwise, restarting the instance, Bitnami resets the wp_options values to the Public DNS server name.
sudo rm /opt/bitnami/updateip
-
Install EMS MySQL Manager
How to Connect to BitNami MySQL Remotely
-
Run this SQL script to set the Pubic IP Address with WordPress
update wp_options set option_value = ‘http://www.agileweboperations.com’ where option_name in (‘siteurl’, ‘home’);
-
Configure WordPress with the Pubic IP Address
sudo vi /opt/bitnami/apps/wordpress/htdocs/wp-config.php
define(‘WP_HOME’, ‘http://www.ringio.com’);
define(‘WP_SITEURL’, ‘http://www.ringio.com’);
- Reboot the instance
- In your Browser type the public ip and see if WordPress is running correctly at Root Directory
-
Login into Woresspress using default bitnami username
Username: user
Password: bitnami
- Add a new use into WordPress with Role of Administrator
- Then remove default bitnami username from WordPress by login in as your new username
- Make a DNS A record for the domain host provider, and use the elastic IP.
Migration
- Both wordpress on your old site and on AWS are the same due to database compatible issues
-
Copy your \wp-content\upload from your old site locally to reload on AWS
sudo chmod 755 /opt/bitnami/apps/wordpress/htdocs/wp-content/
Install and download all plugins to your AWS Worspress instance
- Download or install your old theme and plugins
- Export your Old WordPress database using MyPHPAdmin
- Run the Export SQL Script on the AWS WordPress Instance using your Remote SQL Manager
-
The rerun the SQL script to set the Pubic IP Address with WordPress
update wp_options set option_value = ‘http://www.agileweboperations.com’ where option_name in (‘siteurl’, ‘home’);
To Finish
-
When your domain has delegated run this script again with your domain
update wp_options set option_value = ‘http://www.website.com’ where option_name in (‘siteurl’, ‘home’);
-
Configure WordPress with the Pubic IP Address
sudo vi /opt/bitnami/apps/wordpress/htdocs/wp-config.php
define(‘WP_HOME’, ‘http://www.website.com’);
define(‘WP_SITEURL’, ‘http://www.website.com’);
Links
Amazon Web Services
http://aws.amazon.com/
AWS Management Console
http://aws.amazon.com/console/
Bitnami Wordpres Stack
http://bitnami.org/stack/wordpress
OpenSSH
http://www.openssh.com/
http://sshwindows.webheat.co.uk/
Filezilla
http://filezilla-project.org/
How to Connect to BitNami MySQL Remotely
http://wiki.bitnami.org/cloud/how_to_connect_to_your_amazon_instance#How_to_connect_to_the_BitNami_MySQL_remotely.3f
EMS MySQL Manager
http://www.sqlmanager.net/products/mysql/manager
Delphi XE2 and FireMonkey Application on Windows, Mac and iOS
-2000 Lines Of Code
World IPv6 Day On June 8
On June 8 IPv6 Day starts.